Tuesday, November 26, 2013
Dark Night of the Scarecrow
I just finished rewatching this 1981 horror flick this morning. For some reason, scarecrows, creepy ones in horror movies, always seem to get me most weirded out! I am not sure why except perhaps to say that everyone has their thing that creeps them out. I can handle blood, guts, bugs, chainsaws, knives, creepy kids....blah blah...none of that seems to bother me at all. I can take a scarecrow too, cause who doesn't love the Scarecrow in The Wizard of Oz movie?!
But perhaps this was the movie that made me feel like the creepy scarecrow masks and costumes, were the more scariest! The rotting pumpkin heads or maybe even taking me back to the old classic Headless Horseman?
So I watched Dark Night of the Scarecrow, starring Charles Durning. It's about a mentally handicapped man who is killed cause some of the towns people, this group of men, decide to go vigilante as they think he killed this little girl he was innocently playing with. Of course after they kill him, they find out that no, he didn't harm the girl at all and she isn't dead and in fact, the handicapped man had saved her life! Uh oh....
Well, of course the tables get turned and "Bubba" gets revenge and you are just not sure if it is him or the lawyer or the little girl or dead Bubba's mom that is going after the men who murdered Bubba.
It's a bit of a "B" movie and it struck me as being sad watching it this time around. Sad that people are too quick to blame a mentally handicapped person for something bad happening instead of waiting for the facts to be revealed, jumping the gun and in fact committing murder themselves based on those assumptions. Reminds me of the whole mob mentality. Of course you begin to see what a horrid man Charles Durning plays as one of the men who killed Bubba and in fact had led the others to do so along with him.
The little girl is kinda creepy herself tho' with the little song she keeps singing everywhere. I can see where they could have jumped on that and played her singing it more often and how that would have really made the whole movie alot more eerie! But the scarecrow showing up in places was good too!
It's not too bad of a movie, it was touched up in 2010, tho' I don't remember how the quality was back in '81. It's worth watching at least once tho'.
You can still get it for $12.
Take note of the pitchfork tho' in the beginning....heh heh...it comes back to haunt one of the men...
Sunday, November 24, 2013
How to Corpse a Pumpkin
I came across this link of how to corpse a pumpkin:
http://www.youtube.com/watch?v=zyKjm6ry-VY
Now what is "corpsing"? It is taking a pumpkin or skeleton and making it look rotted and scary! In the case of a skeleton, it can make it look like there is flesh still on the bones!
This is using a craft pumpkin, one of those you can get from Michael's hobby store that is made of the hard foam. As you can see, they look ok, all bright and orange but they do not have that creepy, scary look that I was wanting. I happened upon that link then of how to change my pumpkin to one that looked more sinister.
After watching the vid, I began to collect the necessary items. I at first thought it was just using the regular liquid latex and as such, I picked up a bottle of it from the Spirit Halloween stores. I also picked up the cotton balls and lucked out in that I had managed to get the ones that you can unroll tho', that is not without a bit of patience to do so.
When I first attempted this with the liquid latex pictured here:
It wasn't coming out as well as the video. This liquid latex is too thin and although it was sticking fairly well to the craft pumpkin, it just seemed to make the cotton balls appear thinned out over the orange pumpkin. It seemed to be a more bubbled effect. This is also not easy to apply the liquid latex and I found I had to dab at the cotton which also did not make the texture to be what I was going for.
Looking at the video closer, I realized that I was not using the same type of liquid latex and that what he uses is a type more used for mold building. So I went back to the hobby store and found the exact same stuff he was using.
So how you do it:
I unrolled a lot of the cotton balls and opened them up a bit. Then I spread some of the latex over a section of the pumpkin and then pressed the flattened and unrolled cotton onto that area and then applied another layer of the latex over the cotton.
WOW! What a difference this stuff made! It went on thicker and tho' I still had to be careful in applying it, it gave me the desired effect.
Maneuvering around the cut out letters was not easy either and took a bit of patience. I tore smaller pieces of cotton for those areas and some places, I had to dab on the latex instead of painting it up and down.
Let it dry and then paint.
I also took the lids and added more cotton to the stems and swirled them up and over in curlique shapes.
I let everything dry overnight and then spray painted them all black first. This dried very quickly and then I used a bit of brown paint and dry brushed it over the black very lightly.
After that dried, I took some brighter orange paint and dry brushed that over the pumpkins.
Green was applied to the stems.
If too much of the color was put on, I just sprayed it very lightly with the black again to darken it and tone it down.
I thought they came out rather well! :) I used them just inside the entrance of the Haunted Cave.
I plan on corpsing another pumpkin that I have some of the Halloween Teeth in it that glows in the dark. It has a bit of a scary face on it and I think it would look even better if I corpsed it.
I will probably do a few more of these over the winter and into the spring/summer. After completing 4 of them, I feel very confident in making these.
One jar of that mold building latex completed almost 4 of these pumpkins.
This was a fun project and the liquid latex that I got on my fingers easily rolled off, no problem!
Thank you Hauntcast for the great idea!
http://www.youtube.com/watch?v=zyKjm6ry-VY
Now what is "corpsing"? It is taking a pumpkin or skeleton and making it look rotted and scary! In the case of a skeleton, it can make it look like there is flesh still on the bones!
This is using a craft pumpkin, one of those you can get from Michael's hobby store that is made of the hard foam. As you can see, they look ok, all bright and orange but they do not have that creepy, scary look that I was wanting. I happened upon that link then of how to change my pumpkin to one that looked more sinister.
After watching the vid, I began to collect the necessary items. I at first thought it was just using the regular liquid latex and as such, I picked up a bottle of it from the Spirit Halloween stores. I also picked up the cotton balls and lucked out in that I had managed to get the ones that you can unroll tho', that is not without a bit of patience to do so.
When I first attempted this with the liquid latex pictured here:
It wasn't coming out as well as the video. This liquid latex is too thin and although it was sticking fairly well to the craft pumpkin, it just seemed to make the cotton balls appear thinned out over the orange pumpkin. It seemed to be a more bubbled effect. This is also not easy to apply the liquid latex and I found I had to dab at the cotton which also did not make the texture to be what I was going for.
So how you do it:
I unrolled a lot of the cotton balls and opened them up a bit. Then I spread some of the latex over a section of the pumpkin and then pressed the flattened and unrolled cotton onto that area and then applied another layer of the latex over the cotton.
WOW! What a difference this stuff made! It went on thicker and tho' I still had to be careful in applying it, it gave me the desired effect.
Maneuvering around the cut out letters was not easy either and took a bit of patience. I tore smaller pieces of cotton for those areas and some places, I had to dab on the latex instead of painting it up and down.
Let it dry and then paint.
I also took the lids and added more cotton to the stems and swirled them up and over in curlique shapes.
I let everything dry overnight and then spray painted them all black first. This dried very quickly and then I used a bit of brown paint and dry brushed it over the black very lightly.
After that dried, I took some brighter orange paint and dry brushed that over the pumpkins.
Green was applied to the stems.
If too much of the color was put on, I just sprayed it very lightly with the black again to darken it and tone it down.
I thought they came out rather well! :) I used them just inside the entrance of the Haunted Cave.
I plan on corpsing another pumpkin that I have some of the Halloween Teeth in it that glows in the dark. It has a bit of a scary face on it and I think it would look even better if I corpsed it.
I will probably do a few more of these over the winter and into the spring/summer. After completing 4 of them, I feel very confident in making these.
One jar of that mold building latex completed almost 4 of these pumpkins.
This was a fun project and the liquid latex that I got on my fingers easily rolled off, no problem!
Thank you Hauntcast for the great idea!
House of Wax
House of Wax, 1953, Color
Starring: Vincent Price
It was fitting that TCM (Turner Classic Movies), chose the month of October to honor Vincent Price, the King of the Macabre. The actor who brought wonderful Edgar Allan Poe poems to life.
This Warner Bros. movie is a remake from the original 1933, The Mystery of the Wax Museum starring Lionel Atwill and Fay Wray. Vincent Price looks great in this movie!
Of note, this is also the first 3D movie released in the movie theaters. My uncle had told me that he had gone to see it when it first came out. I could only imagine how scary it must have been back then! Bonus, you can buy it in Blu-Ray and 3D!
This movie starts out with Vincent Price as a talented wax sculptor in a wax museum. His partner burns the place down for the insurance money and later, Vincent Price returns with a new ghoulish twist on his wax figures.
Pay attention to Price's assistant, Igor, in this movie, it's a very young Charles Bronson, under his real name of Charles Buchinsky!
Also, Phyllis Kirk plays Sue Allen and you might know her from the Thin Man series as she portrayed Nora Charles. I recognized her as Ursula di Varamendi in The Iron Mistress with Alan Ladd as Jim Bowie. Jim Bowie had married Ursula.
For those Little House on the Prairie fans, remember Reverend Robert Alden? Yes, a young Robert William "Dabbs" Greer is in House of Wax too as one of the cops.
Who you may not recognize playing Cathy Gray is none other than Carolyn Jones, or who you may know better as the lovely creepy Morticia Addams from the Addams Family! Did you know she was also in the tv series, Batman and also the tv series Wonder Woman, Fantasy Island and numerous other series and movies.
Check out her bio: http://www.imdb.com/name/nm0427700/?ref_=tt_cl_t4
I remember watching this movie when I was a kid and it has always been a favorite of mine.
Be sure and watch it if you haven't seen it!
Sunday, November 10, 2013
Halloween 2013!
Well Halloween has come and gone! September flew by so fast and it's hard to believe that this year is almost over! Time is flying by! I have wanted to really work on my tombstones and what with trips and recovering from said trips, it's been difficult to get the time.
Some updates from this past season:
I had found about all of the dvds for the window projections and converted them all and had put together a couple playlists, one for the month of October and the other for Halloween night itself.
We had gotten the window peepers up and set up the light with a timer so they are illuminated for a few hours a night in the garage. I also set out the new zombie pathway markers but they won't get turned on until Halloween night. They play several sounds when motion or sound activated! I really love them with flashing LED light eyes. I wish I could select which sound I would like to play for they have one that has a blackbird cawing! It sounds the most eerie!
We also put up the porch light covers, just the scary jack o' Lanterns. I noticed they are fading in our brutal Texas sun! :( I'll have to see about repainting them over at the end of the season or if I can find some time for them this year. That's the biggest problem with the plastic and blowmold stuff, is the sun fading them out. Speaking of, I did pick up a few new blowmold ghosts for the backyard from ebay. Which reminds me that I really need to hit the garage sales for better deals as ebay tends to be more expensive. It's fun to win the auctions tho' as you sit and wait for the seconds to tick by, fingers ready at the keys to quickly put in the highest bid as your pulse races and your heart gets up into your throat! And then the elation and thrill of winning! Haha! And yet, you can have the thrill of winning in a garage sale or flea market when you pay 1/3 of the price! LMAO! Not the same but feels better in the wallet! ;)
Pics of the front graveyard:
The new flying witch, really flying in the wind!:
The circle of ghosts with white pumpkin heads and we had decided to spiderweb the graveyard!:
Can see the creepy "Time" piece I had won from the Davis Family all day workshop at last year's Hauntcon!:
Entrance to the Haunted Cave being prepared:
The Front being put up:
At night with an eerie green glow...
The side graveyard with the more 'fun' kind of tombstones:
The front where the Halloween vid projections are shown:
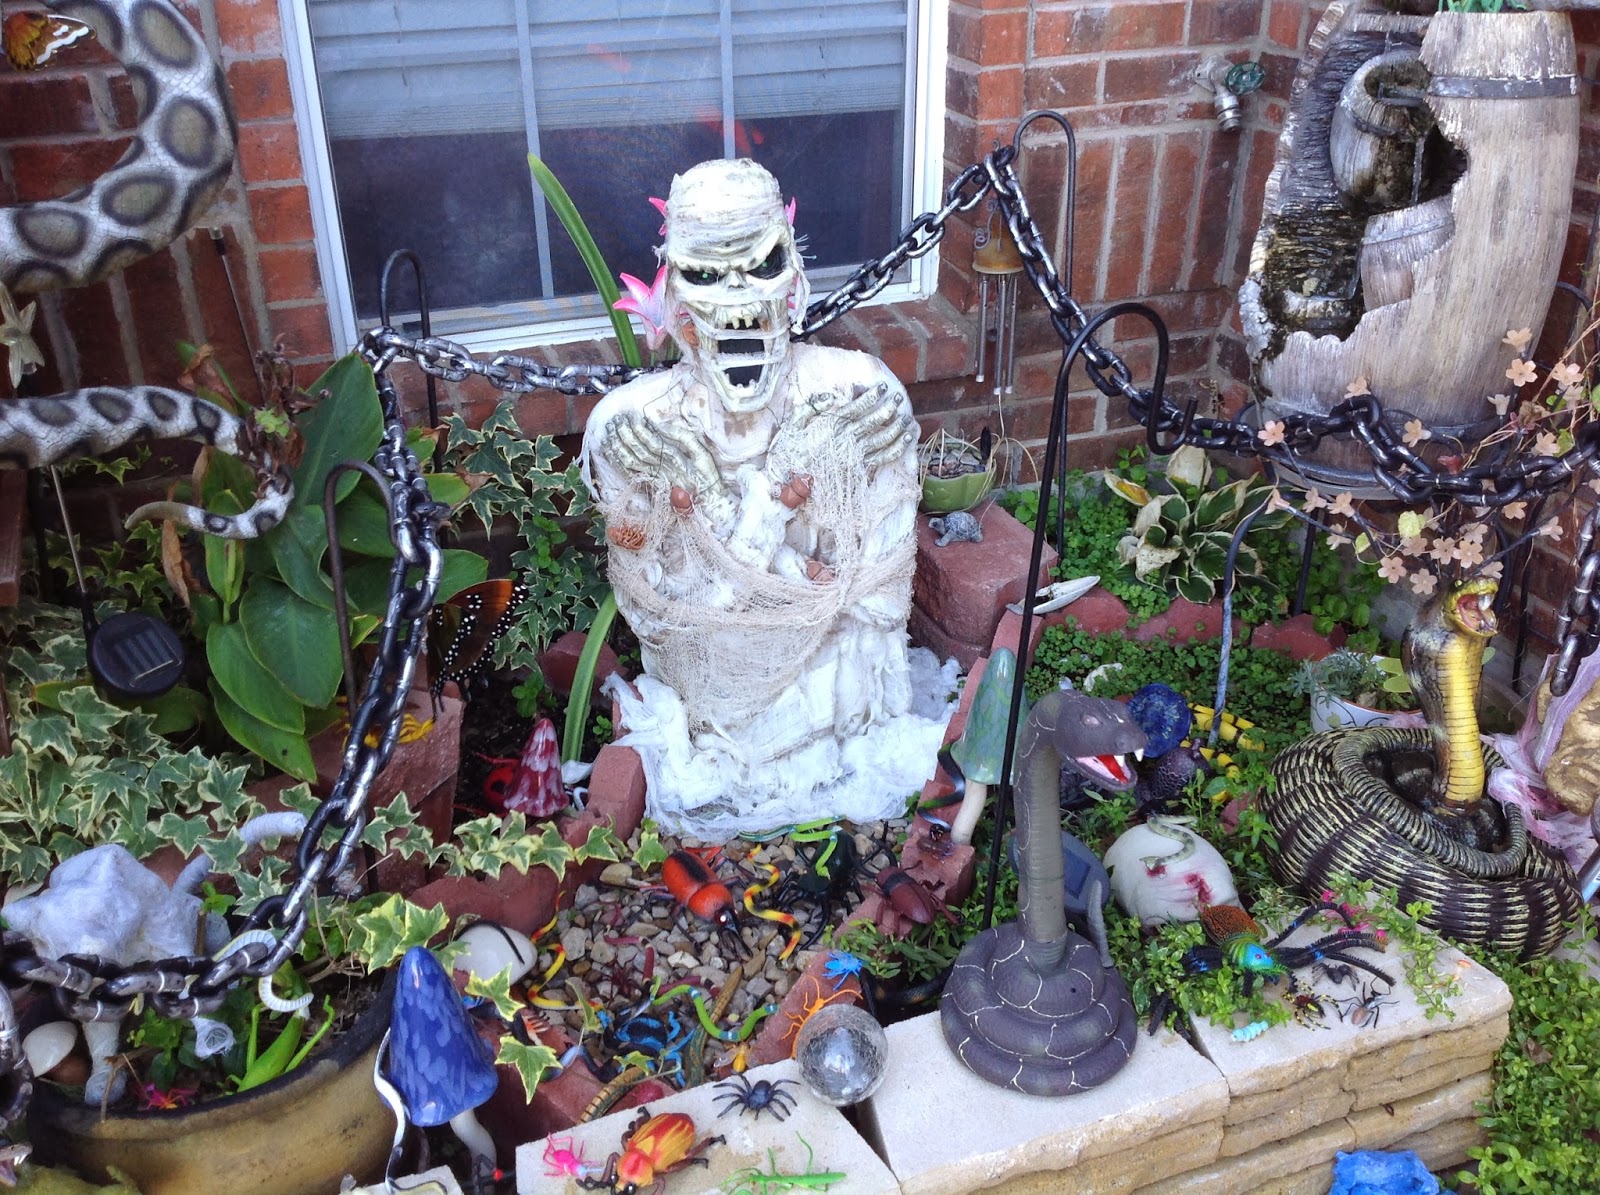
The Egyptian area with thrashing mummy and striking snake:
The entrance of the Haunted Cave with the sticker cockroaches and the rubber ones sprinkled over them to make it look real...many kids would not enter just because of these!!
The skull pile in the back was from A Corpse Maker who made the skull panels that are on the floor there. I added some loose bones on top of it for effect and some spooky material...
This is the cauldron creep on the left and a full skeleton shackled to the wall on the right.
Along the wall of the entrance corridor, is the swamp creature and more skeleton torsos hanging:
This is a creepy kinda guy that we made up in a makeshift open coffin complete with rats and some strobe lights on him....
Looking from the entrance about half-way thru, can see the hanging coffins and all sorts of ghoulish and creepy things:
More notes from this year:
We put up most of the Halloween decorations. We'll get the fence put together and will fill in with some of the tombstones however, I have to spray paint the backs with the Great Stuff all gray. As I redo a tombstone, I will just remove it and reattach a new back or front after scraping off the Great Stuff and using Gorilla Glue and water to get it adhered on. If I don't get them all done as I realized there are ALOT more of them that I did this to last year, then I will be holding them over in the garage and working on them over the winter and as I finish them, we'll place them into storage.
This is the first Halloween that I won't be flying off somewhere on November 1st in 2 years. So I will be able to organize everything into boxes a lot better than before which is important to do for next year so you are not wondering where everything is at. Plus, this year, I have to sort thru what I do have, save for some items for a garage sale next spring if I am still here. I also need to pack things well as we are hoping to sell the house and be out of here next spring. :)
I did get the poster from Midnight Syndicate! I will be displaying it outside the Haunted Cave on Halloween night on my Home Interior's board. I'll cover it with a black sheet or the garden material and then pin the poster on. It looks great! If you have not listened to one of their cds yet, you really should! The latest is a tribute and bears the title: Monsters of Legend. It is really great so be sure and check it out!
I did alot of updates on Facebook, so if you haven't yet done so, please do add me on as a friend there! I have most of the pics up over there as well as a short clip of the Cauldron Creep! Lloyd, who helped me to build him and did most of the mechanics for it, will be writing a blog piece on how he built it and I'll share it with everyone here! :)
For now, here is a short clip of the Cauldron Creep we built:
Some updates from this past season:
I had found about all of the dvds for the window projections and converted them all and had put together a couple playlists, one for the month of October and the other for Halloween night itself.
We had gotten the window peepers up and set up the light with a timer so they are illuminated for a few hours a night in the garage. I also set out the new zombie pathway markers but they won't get turned on until Halloween night. They play several sounds when motion or sound activated! I really love them with flashing LED light eyes. I wish I could select which sound I would like to play for they have one that has a blackbird cawing! It sounds the most eerie!
We also put up the porch light covers, just the scary jack o' Lanterns. I noticed they are fading in our brutal Texas sun! :( I'll have to see about repainting them over at the end of the season or if I can find some time for them this year. That's the biggest problem with the plastic and blowmold stuff, is the sun fading them out. Speaking of, I did pick up a few new blowmold ghosts for the backyard from ebay. Which reminds me that I really need to hit the garage sales for better deals as ebay tends to be more expensive. It's fun to win the auctions tho' as you sit and wait for the seconds to tick by, fingers ready at the keys to quickly put in the highest bid as your pulse races and your heart gets up into your throat! And then the elation and thrill of winning! Haha! And yet, you can have the thrill of winning in a garage sale or flea market when you pay 1/3 of the price! LMAO! Not the same but feels better in the wallet! ;)
Pics of the front graveyard:
The new flying witch, really flying in the wind!:
The circle of ghosts with white pumpkin heads and we had decided to spiderweb the graveyard!:
Can see the creepy "Time" piece I had won from the Davis Family all day workshop at last year's Hauntcon!:
Entrance to the Haunted Cave being prepared:
The Front being put up:
At night with an eerie green glow...
The side graveyard with the more 'fun' kind of tombstones:
The front where the Halloween vid projections are shown:
The Egyptian area with thrashing mummy and striking snake:
The entrance of the Haunted Cave with the sticker cockroaches and the rubber ones sprinkled over them to make it look real...many kids would not enter just because of these!!
The skull pile in the back was from A Corpse Maker who made the skull panels that are on the floor there. I added some loose bones on top of it for effect and some spooky material...
This is the cauldron creep on the left and a full skeleton shackled to the wall on the right.
Along the wall of the entrance corridor, is the swamp creature and more skeleton torsos hanging:
This is a creepy kinda guy that we made up in a makeshift open coffin complete with rats and some strobe lights on him....
Looking from the entrance about half-way thru, can see the hanging coffins and all sorts of ghoulish and creepy things:
More notes from this year:
We put up most of the Halloween decorations. We'll get the fence put together and will fill in with some of the tombstones however, I have to spray paint the backs with the Great Stuff all gray. As I redo a tombstone, I will just remove it and reattach a new back or front after scraping off the Great Stuff and using Gorilla Glue and water to get it adhered on. If I don't get them all done as I realized there are ALOT more of them that I did this to last year, then I will be holding them over in the garage and working on them over the winter and as I finish them, we'll place them into storage.
This is the first Halloween that I won't be flying off somewhere on November 1st in 2 years. So I will be able to organize everything into boxes a lot better than before which is important to do for next year so you are not wondering where everything is at. Plus, this year, I have to sort thru what I do have, save for some items for a garage sale next spring if I am still here. I also need to pack things well as we are hoping to sell the house and be out of here next spring. :)
I did get the poster from Midnight Syndicate! I will be displaying it outside the Haunted Cave on Halloween night on my Home Interior's board. I'll cover it with a black sheet or the garden material and then pin the poster on. It looks great! If you have not listened to one of their cds yet, you really should! The latest is a tribute and bears the title: Monsters of Legend. It is really great so be sure and check it out!
I did alot of updates on Facebook, so if you haven't yet done so, please do add me on as a friend there! I have most of the pics up over there as well as a short clip of the Cauldron Creep! Lloyd, who helped me to build him and did most of the mechanics for it, will be writing a blog piece on how he built it and I'll share it with everyone here! :)
For now, here is a short clip of the Cauldron Creep we built:
Subscribe to:
Posts (Atom)


