
We had searched and saw a few others who had made this guy but slightly different. A lot seemed to depend on where you live and what materials you could get. Yet, each tutorial didn't have one element or another and it was difficult to follow but, we managed to get him together.
Took a skeleton from Spirit and broke him down.
Used a deer motor for the head to go up and down.
LED blue-green lights for his eyes that are powered off a 9 volt battery.
Got a wiper motor for inside the cauldron to make the stick stir. We didn't like how fast the wiper motor went, we wanted a slow moving guy, so we got a 5 amp power supply and it slowed down the movement perfectly!
Now the first build of him, we used mostly all PVC pipe.
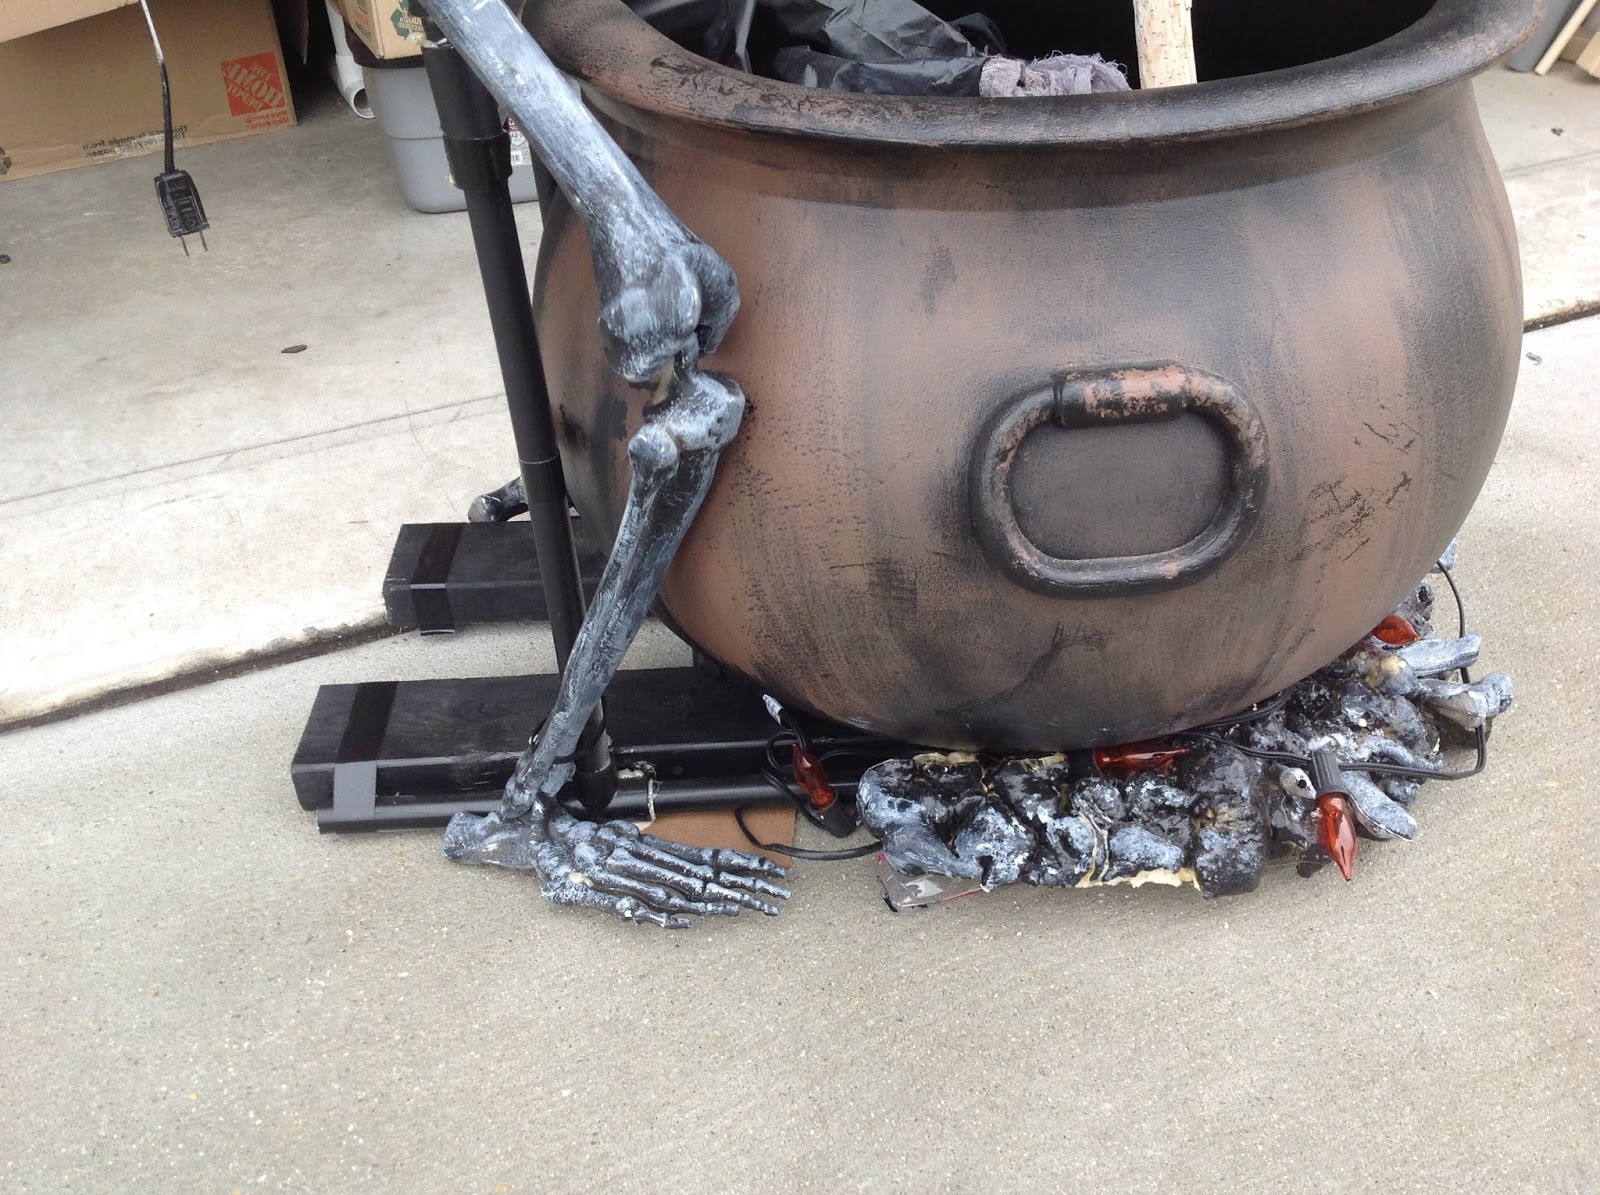
I added some Great Stuff coals under the cauldron and added a string of flame flickering bulb lights to it and I painted the coals black and dry brushed grey. I also added some bones sticking out before the GR dried.
We had slid the pvc pipe feet under the cauldron and added a couple 2x4s to hold it there.
The stick I got from Michaels' as it is very lightweight as the one I found in the woods was just much too heavy for the wiper motor to handle.
The clothes were old costumes I had on hand and a piece of black sheet.
I painted the skull, arms and legs black and then splooged it with a grey paint using a sea sponge.
This is ours in the haunted cave in Texas:

He came out pretty cool and we tucked him into the back of the cave and you could see him as you entered, at the end of the corridor. He freaked out a lot of people! We pumped some fog into the cauldron from Froggy's Fog and then added a changing color pumpkin light and then an iPad hidden away made the bubbling sound. He moves very slowly, stirring the stick and then his head moves down slow and then as he raises it, it comes up a bit quick there at the end.
Very creepy guy! We love him!
Then we moved from Texas to Delaware. Our cauldron creep did not fare so well even tho' we tried to protect him and put him in last, didn't matter because he got crushed and some of the pvc broke. We fixed him as best as we could but he was a bit smaller, not as high up, crouched lower and we just didn't like what the results were. He seemed a bit more rickety. :( We got by with it last year but we knew we couldn't let him go any longer and he needed to be rebuilt more sturdy and solid.


As you can see, he was mostly just pvc and then the bones attached. Not a very solid piece and why it was a bit shaky and rickety. He did work tho' ok enough but he seemed smaller and more unstable after the move. But here he is in place in the back of the cave:

We do most of our builds and work on the home haunt during the weekends when my friend is available. He's a technical engineer so he does most of the mechanical stuff and I do the creative aspects. The cauldron creep was our first big project.
So he took the cauldron creep all apart and we began the rebuild. We mounted the cauldron on a piece of plywood and used 2x4s for legs and bought more wood from Home Depot to act as a brace. You can see the legs of wood we used that are used for railings for like decks or stairways. We also used some aluminum metal brackets and plates to make some of the connections and lots of screws to get some of the pvc to stay in place. A bit of glue as well.


If you notice in the one video, you can see the hump raise up the cloth behind his head. That gave me an idea for an alien but that's another build, another time. ;) My friend wants to fix that maybe later on by shortening the plate he used but we may leave it or make the hump come up higher so you won't see that happening.
This is where we painted the wood and extra pvc we used as well as the plywood. I've also already added the Great Stuff on the plywood and it was painted black, before the dry brushing of gray.


Inside the cauldron with the wiper motor:

We did use some chicken wire for the hunch and at the last minute, he decided he wanted to give the guy some ribs so he corpsed the ribs and I painted them with wood stain. Now so you know, we originally had the cauldron creep just painted black and grey and he looked awesome. But as I had made a hall of corpsed skeletons (idea from Transworld 2013) and having taken a class on corpsing skeletons from Hauntcon 2013, we decided to corpse the cauldron creep too to make him more creepy!
 You can also find a great tutorial on Youtube for corpsing by Allen Hopps with Stiltbeast Studios, and if you are not following this wickedly creative man, you NEED to!
For our corpsing that we did on the cauldron creep, we only used like one layer, very thin as I wanted just a light bit of flesh to still be on the bones, enough to creep him out. I also just use the dark wood stain and don't add anything red nor to make him gooey because I don't care to have him look wet or gooey with blood. We also love holes and strands, to have them over the jaws or eyes is just a really great effect. I used clear trash bags we got in bulk really cheap and it doesn't take much to cover them. He is mostly in the dark, otherwise I would probably hit him with some highlights with a lighter color here or there to give him more dimension. But there is a lot going on in the garage where he will be at so maybe later I'll go back and touch him up. What is nice with the plastic bags, you can always add more or cut it off it you don't like it.
 His eyeballs were made out of those cheap novelties and we drilled a hole in them and put the LED lights inside to help dim the brightness of the LEDs. But my friend didn't glue the eyes in so if you pushed on them too hard, they'd pop back inside and it was hard to get them out again. So I applied some hot glue around the sides and then thought I would use the heat gun to smoothe out the glue a little bit and oops! Too much heat on the one eye dented/melted it slightly. But eh, as we all know, mistakes are almost always good and now his eyes are slightly off but they look cool! I went ahead and corpsed his head and one foot that will show and then did his hands and on his arms somewhat.
I did take more GR and added it to the plywood and while wet, used a thick rubber glove and patted it to give it a more rough texture. I then painted it all black and dry brushed grey so that it's not just a neat round circle of coals, but that it spreads out a bit more naturally. You can see in the pic below on the board and the dry Great Stuff.


Now we were having issues with the hand holding the stick at the top. We have a screw in the stick with garden wire (LOVE THAT WIRE) to hold the hand to the stick.
At the top, where the hand grips the stick, it has to be loose so that the stick can swivel and move up and down but what was happening was that the hand of the skeleton is more like the high-5 and so I took the heat gun and very slowly heated the fingers up and curled them around the stick. This came out well but it wasn't staying so I figured when I went to corpse it, it would help to hold the curling fingers in place but it still wasn't working well as the wire was getting caught and it was too rigid and rough of a transition so I got the idea to use the plastic of the corpsing as your sling as it were, attaching the plastic from the fingers around to the other side of the hand, and so wha~la, it held the stick in place around the stick in the back. It's not attached to the stick, so the stick can move freely but it's in like a sling/sleeve and can rotate and move up and down freely. Problem solved!
I don't have dimensions for you for the height or length of items. Next we take him apart if ever, we'll do measurements but a lot of it is how high or big you want him. The angles was from me posing and making stirring motions to make it look more realistic. We also added some braces to help stabilize him. He doesn't wobble anymore as it is all attached with those aluminum brackets to the plywood. We wanted him kinda hunched over but not too much.


The costumes we removed as we had two of them on there and they were just too small and he had issues getting them on. I stepped in and said let's use a black sheet and tho' he was skeptical at first, he didn't say anything and let me work my magic there. So we draped it over from the back and then brought each end around to make sleeves. I then cut the sleeves out and used the bottom part to cover his lower torso and we safety pinned it in place first and then once happy with how it looked, amazing my friend! ;) I took velcro and we applied it to the places we could see the safety pins at. Then we took the one costume which has those raggedy bits of grey material dangling and draped that just over the hunch and then spread out the grey material to hang nice and that will get fussed with later once he is in place. The last piece was the green spooky material over his head just to make him look a bit more creepy.
In these pics and in the vid, you can see the plastic bag we have under him, that was because we were painting and it was easier to move him and grip it to move him. Plus, we are going to use that to help cover the floor of the garage as we will be adding some dirt and skull panels that I got from A Corpse Maker a couple years ago.
This is a few second video of the corpsed cauldron creep in action:
We'll put together a longer one with all the fun stuff turned on, eyes, fogger, lights, sound, etc and post it in a few weeks. Right now, we've moved him to the back of the garage, close to where we want him so he is out of the way.
Feel free to ask any questions, leave a comment or such. :) Always happy to help. It's really not that hard to make once you get how the motors work, it's just about building the frame work and the rest is just creative painting and whatnot. :)
Enjoy and thanks everyone for all your kind words on Facebook! :)
~*Bugs n Hisses*~
GP
/|\
No comments:
Post a Comment